A healthy, quick and easy Homemade Vegan Pasta Dough, that's secretly packed with lots of plant protein. It looks and tastes just like regular pasta, but with extra goodness.
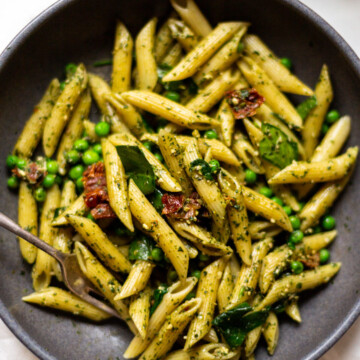
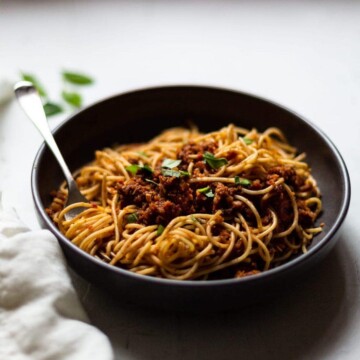
We try and make fresh pasta whenever we can and enjoy using it in all of our recipes. It goes really well with our Wild Garlic Pesto, fantastically in our Coconut Curry Pasta and is delicious with our Mushroom & Lentil Bolognese.

I've followed other homemade vegan pasta dough recipes before, but none of them offered much nutritional value on their own.
My son enjoys pasta as much as the next toddler. And at the moment he's asking for 'Luca pasta'. By this he means pasta from the Disney movie Luca in which they have what looks like plain pasta with basil. I've managed to convince him that they're eating peas so that's one hurdle overcome. The other aspect is that I didn't want him eating a load of plain pasta and it not giving much value to his body. So after a search online and a kitchen experiment, Steve and I successfully made a tasty Vegan Pasta Dough using only two ingredients - Silken Tofu and 00 Flour.
Ingredients
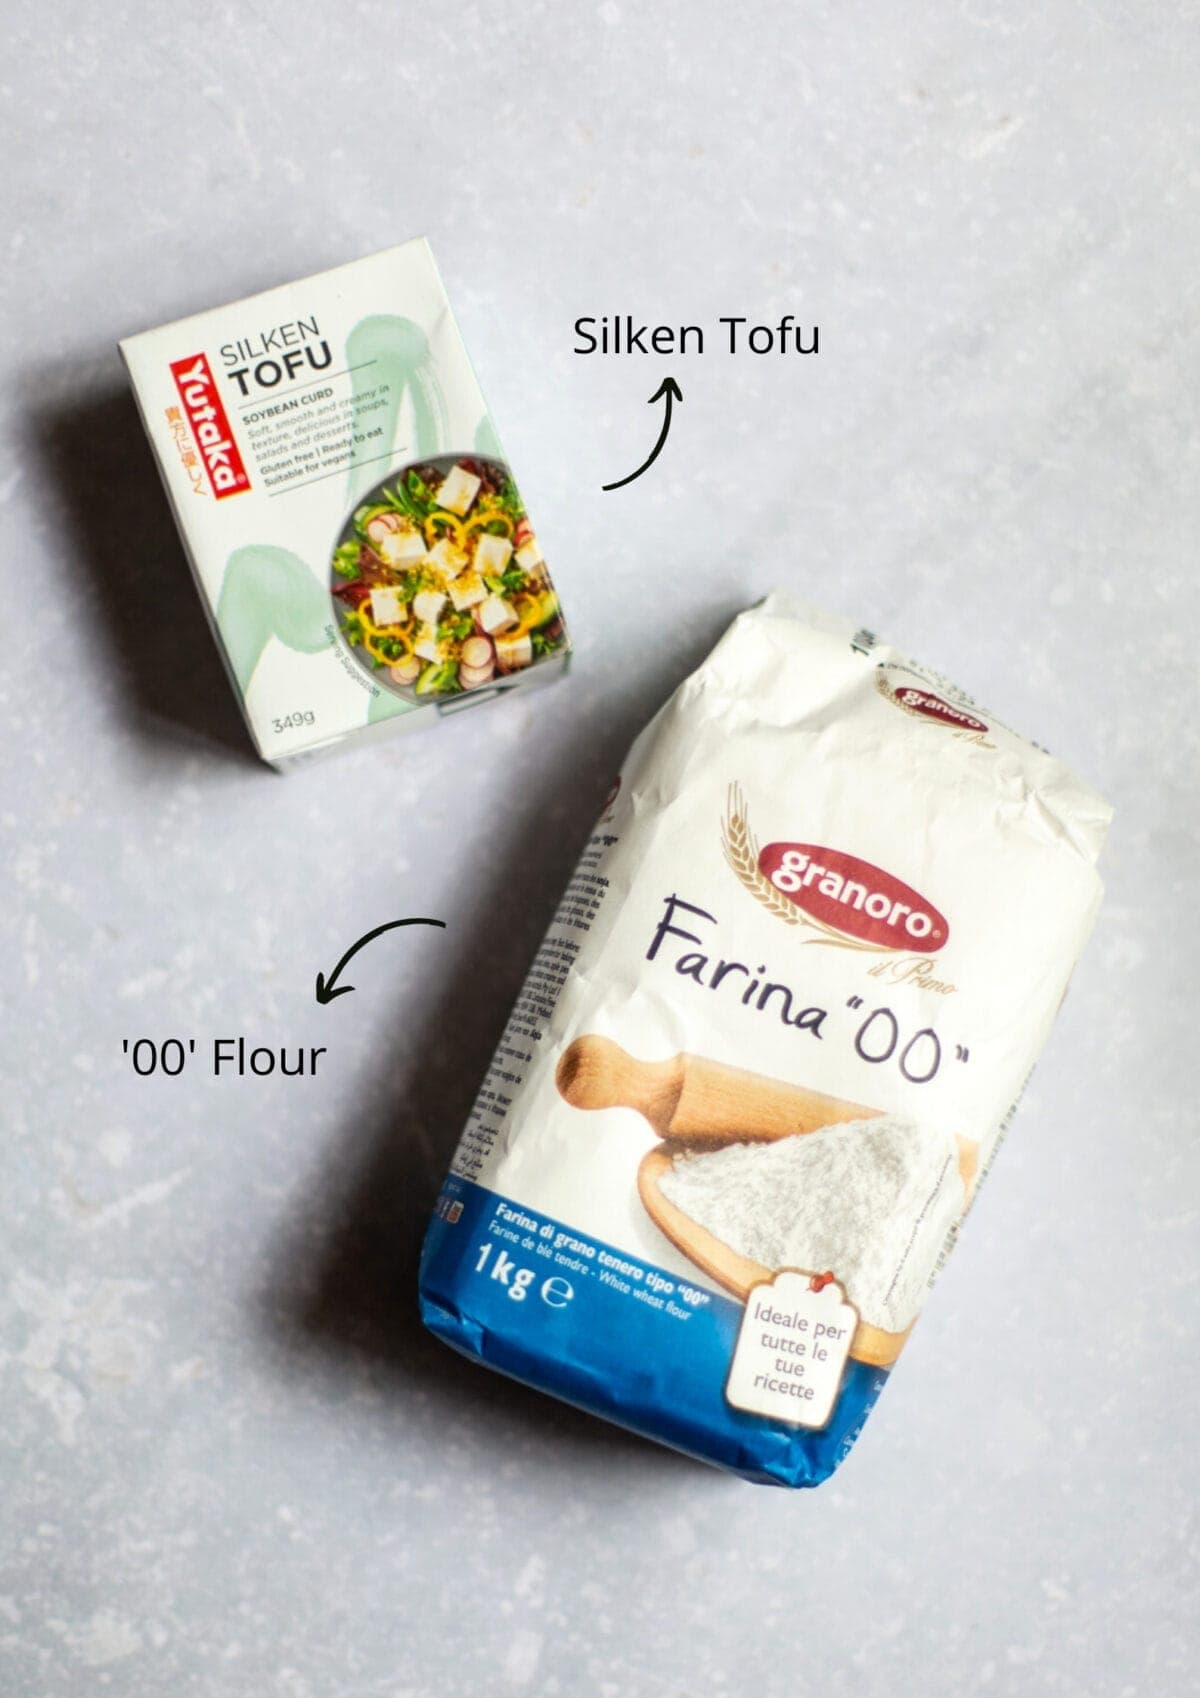
- Silken Tofu - Using Tofu means that you give yourself and the kids a healthy serving of complete plant Protein (which means it contains all 9 essential amino acids), Calcium, Iron and other essential micronutrients such as Vitamin's C and K. For more comprehensive information on the nutritional benefits and content of Tofu, I as always, recommend taking a look at NutritionFacts.org.
Silken Tofu is widely available in supermarkets, health food stores and independent Asian food stores. - '00' Flour - This is very finely ground flour and is used most typically in Homemade Pasta doughs. It's also sometimes also used for making pizza dough. You should be able to find this in most supermarkets.
Equipment
- Mixing Bowl
- Wooden Spoon
- Sharp Knife
- Rolling Pin
- Cling film/plastic wrap
- Small blender or food processor
- Pasta Machine (optional)
- Pasta drying rack (optional)
- Colander or tongs (for draining, once cooked)
A Pasta Machine will make your life easier when it comes to making any homemade pasta, and they can be relatively inexpensive. We use an Atlas 150 Pasta and haven't had any issues with this, plus it's affordable & has a variety of attachments you can buy as extras.
How to Make it
Making the Pasta Dough
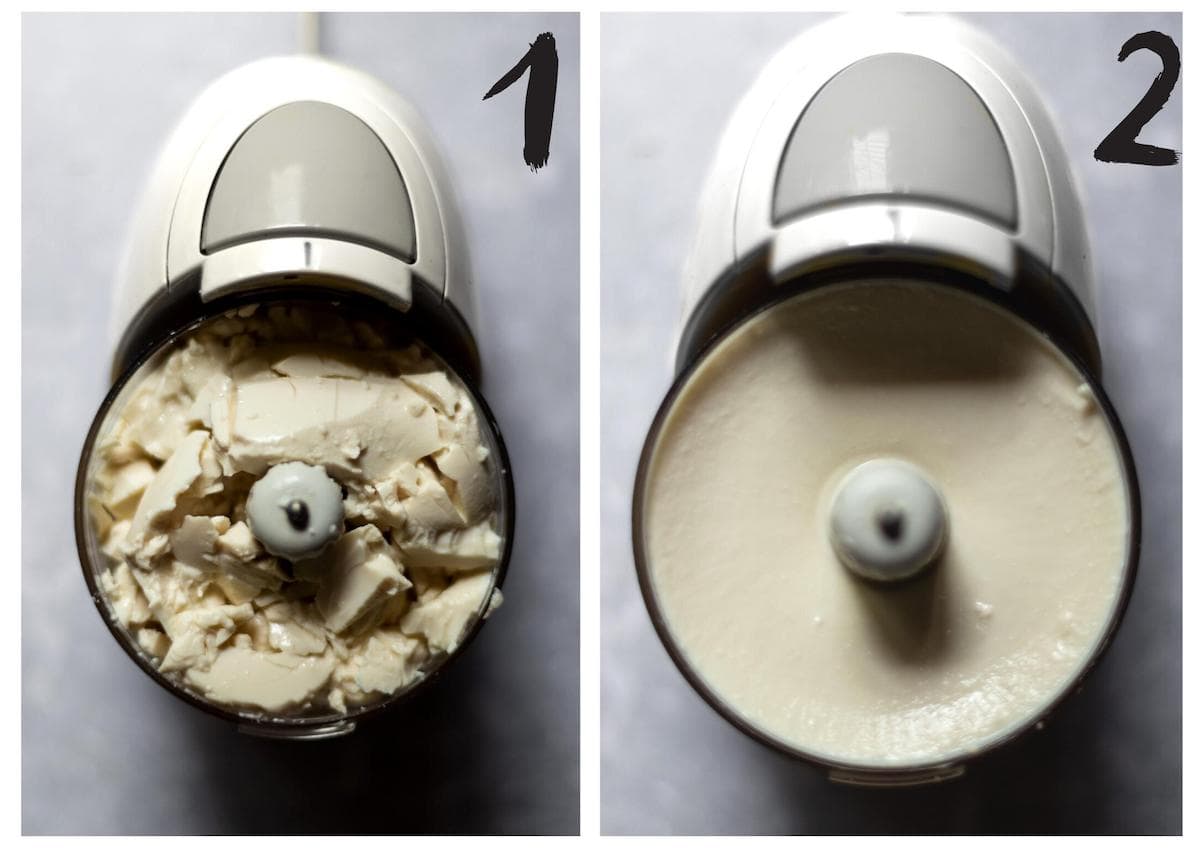
Steps 1 & 2: Place the Silken Tofu in to a small blender or food processor and blend until smooth.
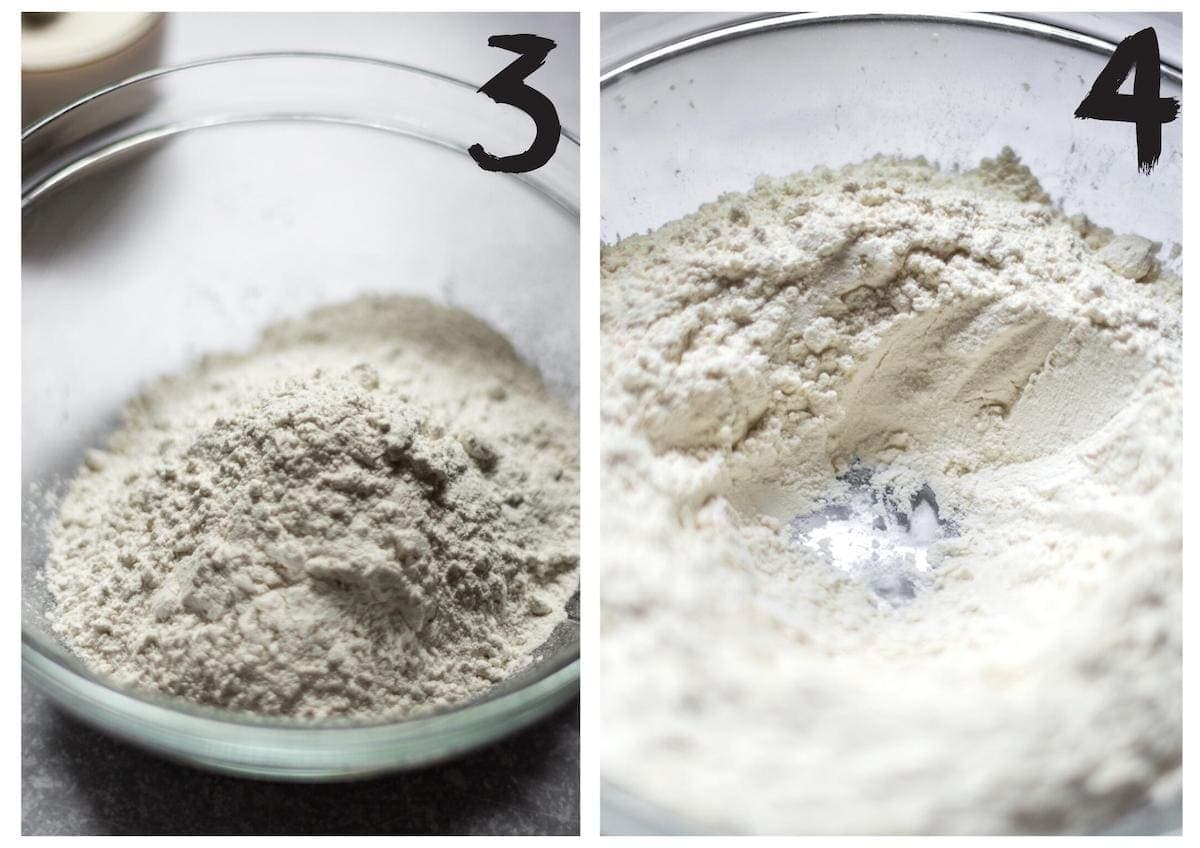
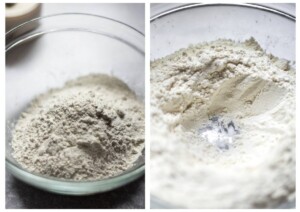
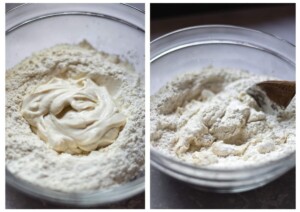
Steps 3 & 4: In a large mixing bowl, add the flour and make a well in the centre.
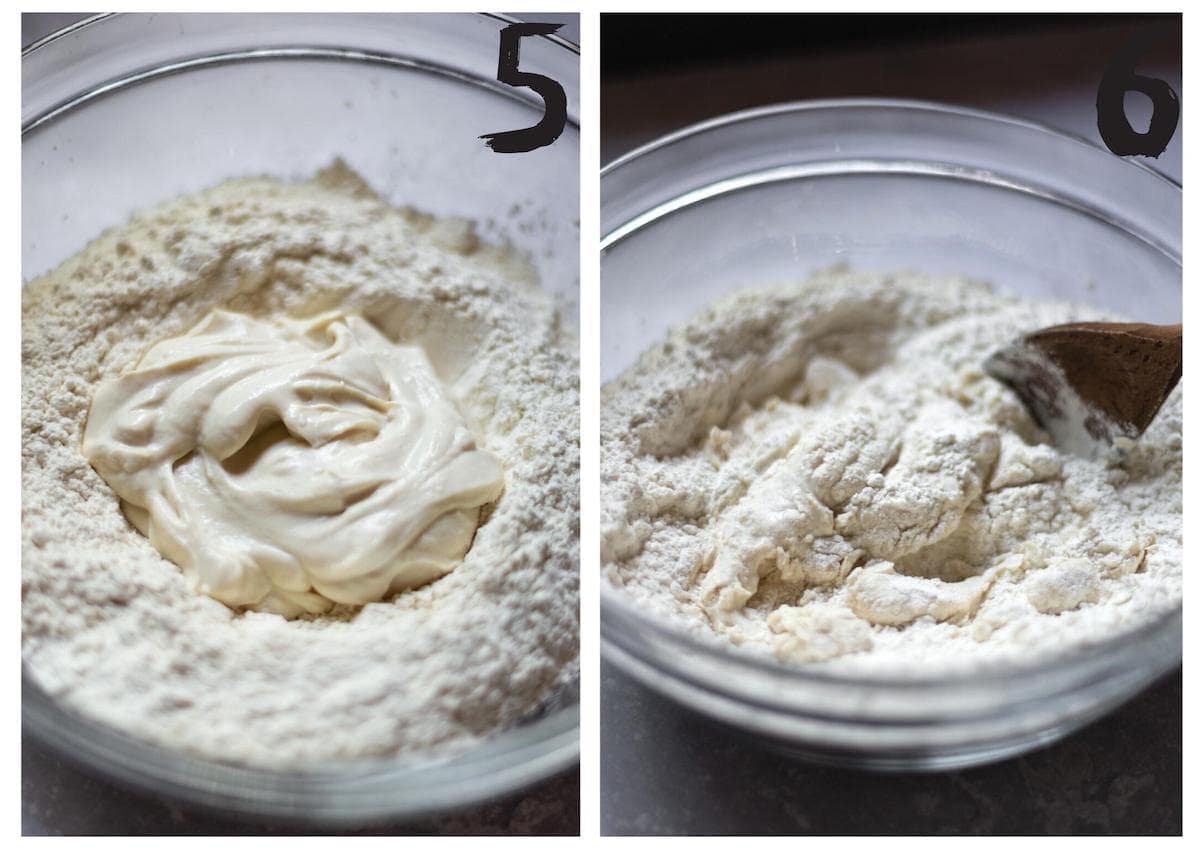
Steps 5 & 6: Using a spatula or spoon, scoop out the blended Tofu in to the centre well in the Flour and begin to fold the mixture together.
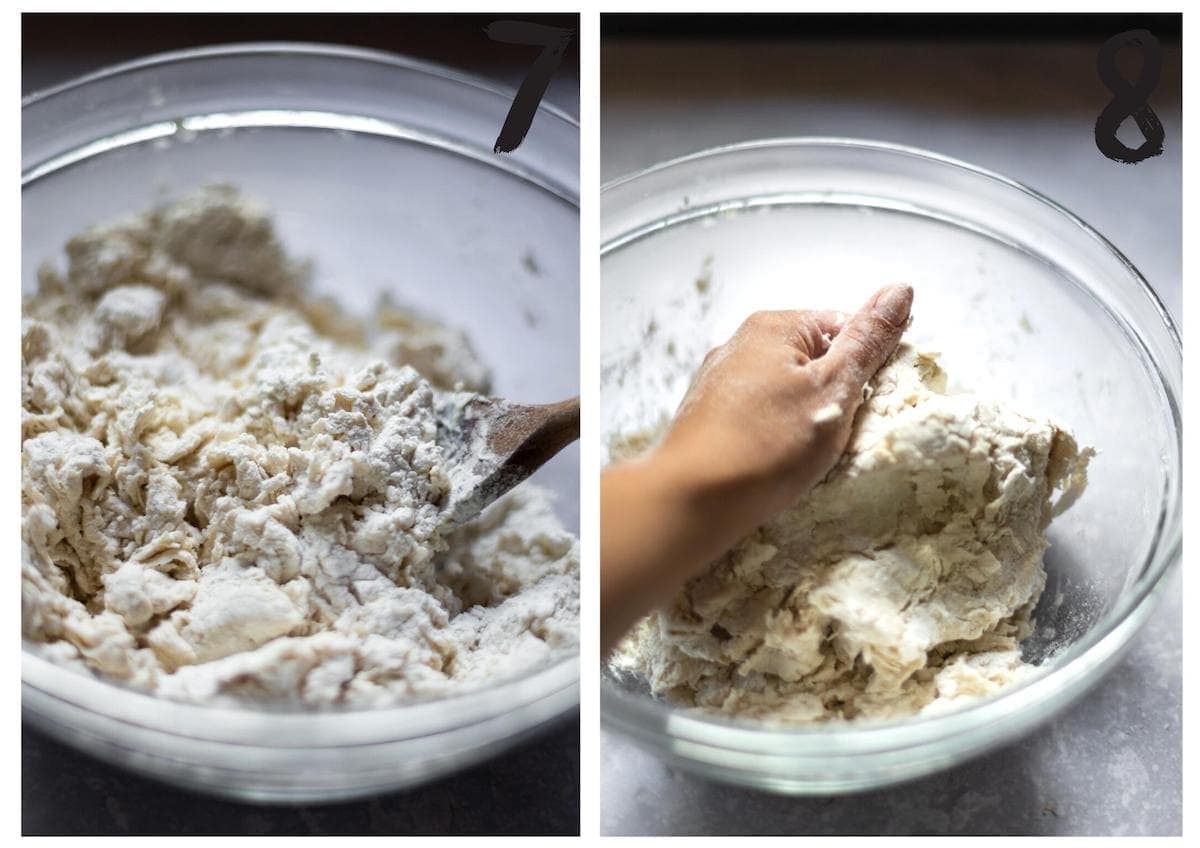
Step 7: Continue to fold the mixture until it starts to form a ball.
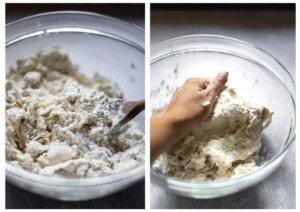
Step 8: Then use your hands to knead the dough together.
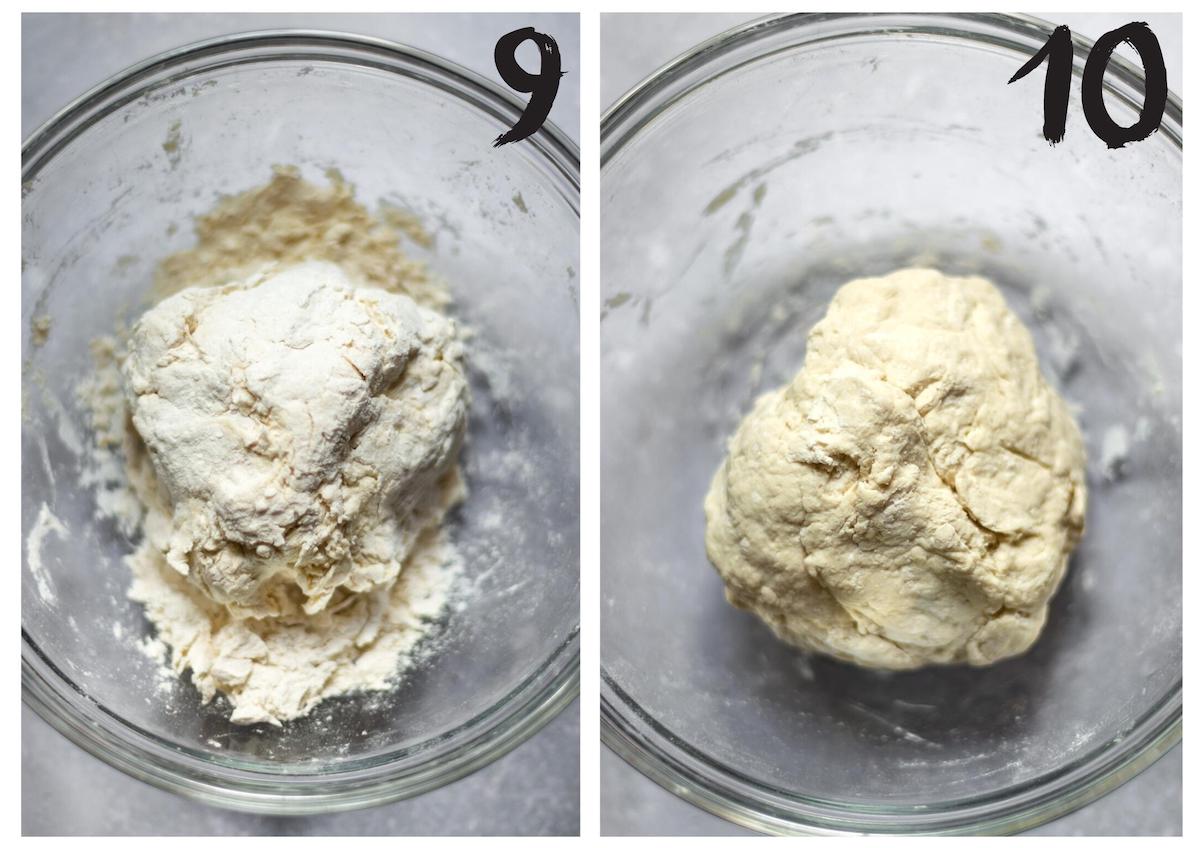
Steps 9 & 10: Continue combining the dough in the bowl with your hand until all the flour and tofu is combined, as pictured above.
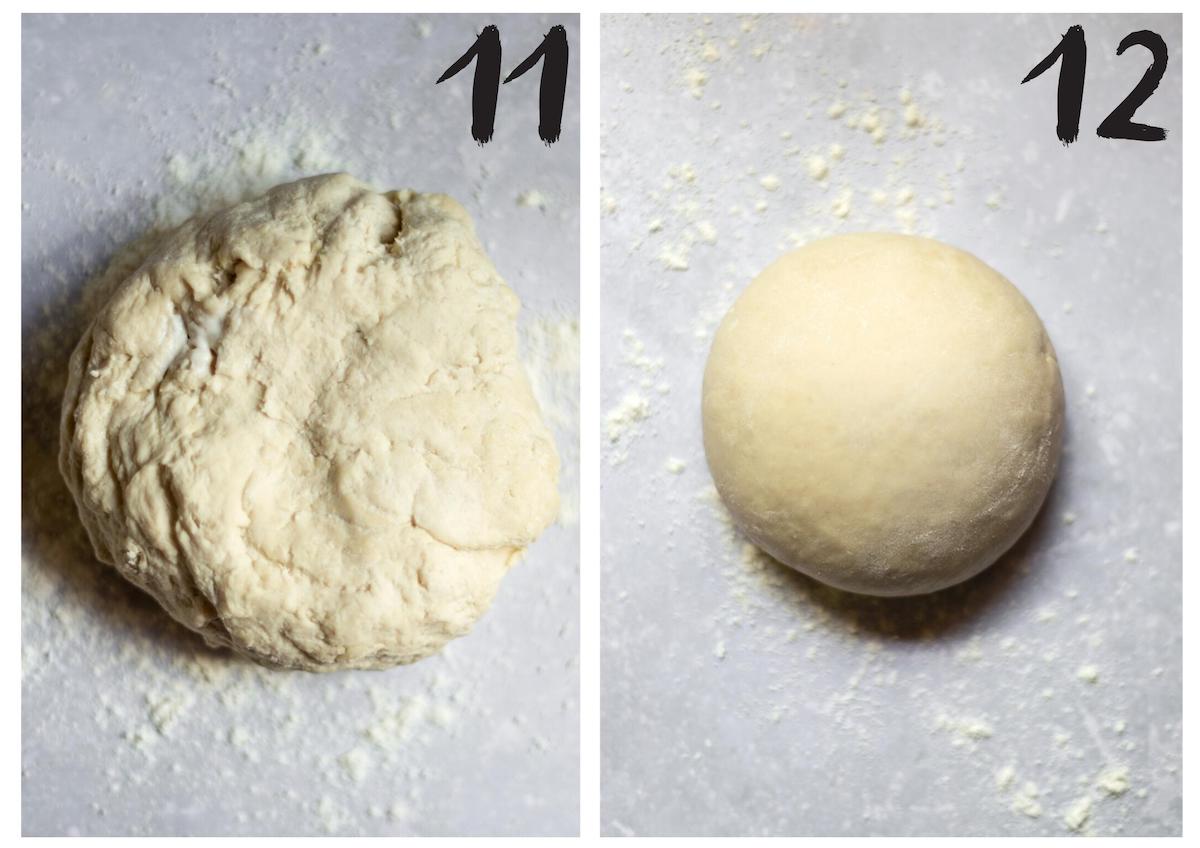
Steps 11 & 12: Remove the dough from the bowl and transfer to a lightly dusted surface. Knead for 5 minutes or until you have a smooth dough (right). Wrap the Dough in cling film and chill in the fridge for a minimum of 30 minutes. During this time the moisture from the Tofu will be absorbed by the flour and the gluten strands will relax, giving a strong, pliable, roll-able dough.
Rolling the Dough

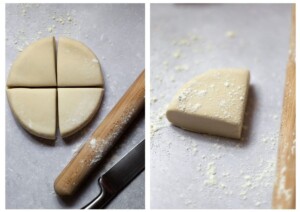
Steps 13 & 14: Divide the dough in to 4 and roll out each quarter separately. Store any unused pasta dough in the fridge, tightly wrapped in cling film (biodegradable options are easily found online with a quick Google).
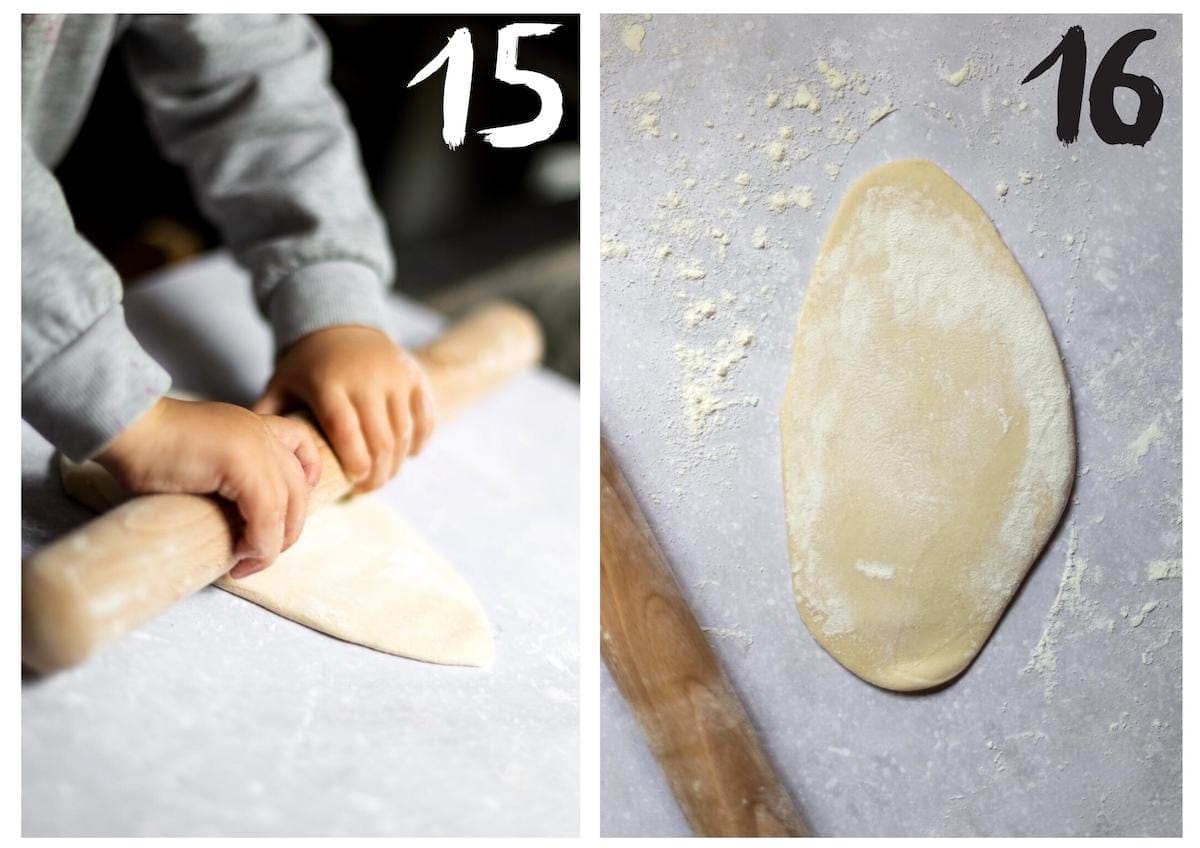
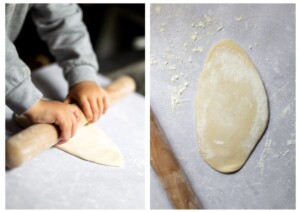
Steps 16 & 17: Rub over some flour on each side of the rolled out dough. (You may need to do this a few times during the rolling process).
Using a rolling pin, roll out the dough to approximately 15mm or about ½ an inch thick.
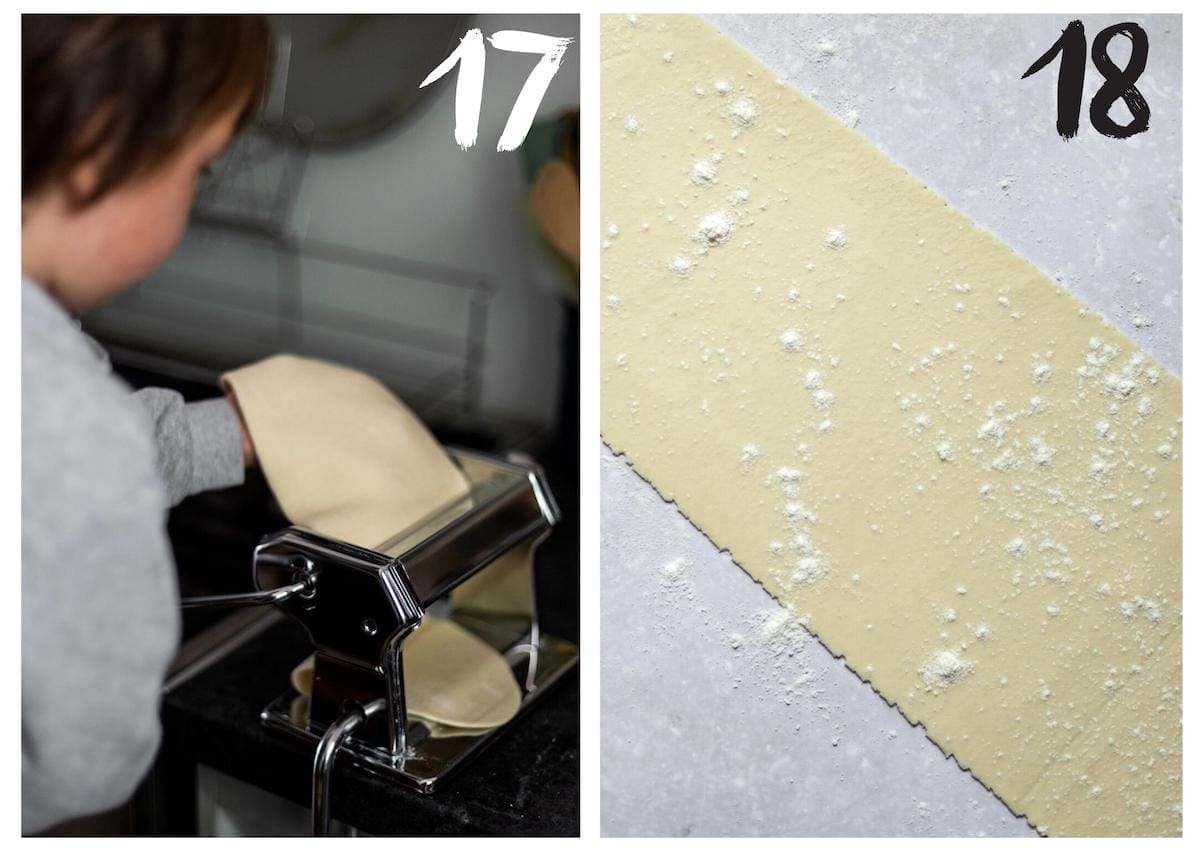
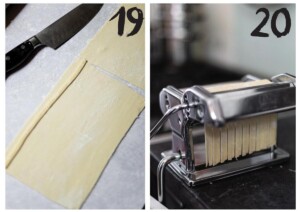
Step 17: If using a Pasta Machine, run your Pasta Dough through using one setting at a time, starting on the thickest. We start at setting No.1 and make our way to No.5, which is approximately 1.5mm in thickness. Check your Pasta Machine information booklet for information on thickness settings, ours is numbered from 1-9, number 1 being the thickest setting.
Step 20: Transfer to a lightly floured surface to stop the thinly rolled dough from sticking.
If you're rolling and/or cutting your pasta by hand, there is a very useful website called recipetips.com that I've come across to help you be able to cut whichever shape you need with ease.
Cutting your Homemade Vegan Pasta to size

Step 19: Cut your rolled pasta in to lengths that are the length you want your pasta to be. Pictured above the pasta is cut to approximately 30cm/11inches. (I use a strand that's already been cut to then cut each subsequent length of pasta to ensure they're all the same length).
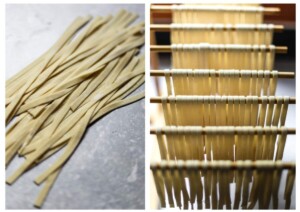
Step 20: Then using the pasta cutting attachment on your pasta machine (we used the Fettucine attachment for ours) Roll through the 30cm sheets, one at a time, gathering the cut pasta from the underside of the machine after each sheet has gone through and placing it on the rack, as shown below. Repeat this process until all of the
TIP: Be sure to lightly dust your sheets of pasta prior to taking them through the machine or they may stick.
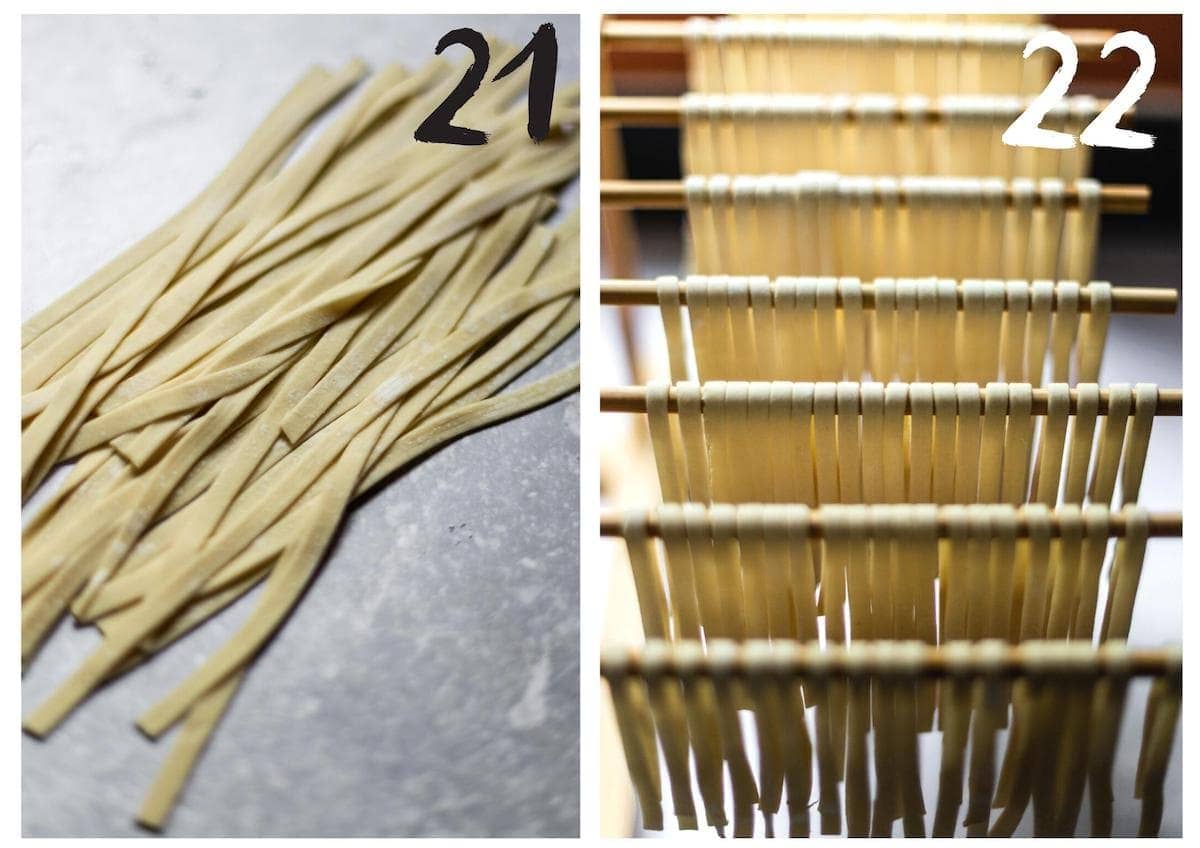
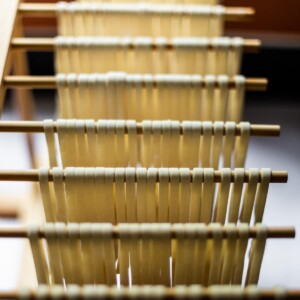
Steps 21 & 22: Hang the cut strands of pasta on a pasta drying rack until you're ready to cook it all. NB: If you don't have a drying rack, you can place the cut pasta gently on a floured surface.
Storage
To store any pasta dough, tightly wrap it in cling film (biodegradable & compostable options are available online), and store in the fridge for up to 2 days. Alternatively you can freeze it for up to 4 months. If freezing, allow to completely defrost prior to use.
Recipe tip
Make sure to lightly flour your Pasta Dough at every stage. This helps prevent your pasta from sticking to surfaces, and itself. The last thing you want to happen is your pasta strands sticking together after all that work.
I like to grab a small pinch at a time, sprinkle it over the pasta, then softly smooth the flour over the surface of the Pasta Dough with my fingers.
FAQ's
Yes pasta dough does need to rest after kneading to allow the flour to fully hydrate and the gluten to relax.
Yes it's fine to rest pasta dough over night, just make sure that it is completely wrapped in cling film (plastic wrap), so that no air can get to it. If any air does get to the pasta dough then it will dry out very quickly in any exposed areas.
No, within reason. As long as your pasta dough is completely wrapped in cling film (plastic wrap) it can be kept in the fridge for up to 2 days before being used.
It is important rest it for the reasons already given. If you don't then it will be far too elastic to work with as the gluten won't have relaxed.
Pasta Recipe Ideas
Here are a few of our Delicious Pasta Recipes that you might like to try.
Recipe
Healthy Homemade Vegan Pasta Dough
Equipment
- Mixing Bowl
- Wooden Spoon
- Sharp Knife
- Rolling Pin
- Cling film/plastic wrap
- Colander or tongs
- Small blender or food processor
- Pasta Machine (optional)
- Pasta drying rack (optional)
Instructions
Making the Dough
- Place the Silken Tofu in to a small blender or food processor and blend until smooth.1 pack Silken Tofu

- Measure out your flour and pour in to a mixing bowl, then make a well in the centre of the dough.250 g 00 Flour
- Pour the blended Silken Tofu in to the centre of the Flour. You will need to use a spoon or spatula for this.
- Using your wooden spoon begin folding the Silken Tofu and Flour together until it starts to form a ball. Then use your hands to knead the dough together. Continue kneading the dough until all the flour and tofu is combined.
- Remove the dough from the bowl and transfer to a lightly dusted surface. Knead for 5 minutes or until you have a smooth dough.
- Wrap the Dough in cling film and chill in the fridge for a minimum of 30 minutes.


Rolling the Dough
- Remove from the fridge and cut your dough in to 4 sections.
- Lightly dust each section with flour and roll to about 1inch thickness using your rolling pin.
- Dust with Flour again, then begin rolling through the Pasta Machine, starting on the thickest setting.
- Keep moving through your settings until you reach your desired thickness. We stop at setting No. 5 which is 1.5mm thick. Refer to your instruction booklet for thickness settings specific to your equipment.
- IF YOU'RE NOT USING A PASTA MACHINE: Continue using your rolling pin to get a thin sheet of pasta approximately 1.5-2mm thick. Cut your pasta to length using a sharp knife. Gently fold over each sheet a few times and cut the rolled up pasta sheet in to strips. Unravel the pasta strands and hang to dry as per the instructions below

Cutting your Pasta to size
- Once rolled, dust again with flour. Then cut your sheet in to roughly 30cm/11inch lengths.
- Attach your chosen Pasta attachment to the machine. Then roll each length of the sheet of Pasta through.
- Hang your cut Pasta strands on a Pasta drying rack. Alternatively dust the Pasta again with flour and gently place on a floured surface until ready to cook.
Cook- (To serve with a sauce or pesto of your choice)
- Bring a pan of water to the boil.
- Place your pasta strands in the boiled water and cook for 3-4 minutes or until they begin to float to the top of the water.
- Using a colander or a pair of tongs, remove the pasta from the water and transfer to a bowl or pan with your chosen sauce. Reserving some of the pasta water to be used later. (see tip in the notes section below)
Missy
Love this variation for the fact that it has all the added goodness of the tofu. The kids really enjoyed making it too.
Yasmin
We feel the same way about this one Missy. We're glad that your children enjoyed getting involved in making it too. 😊