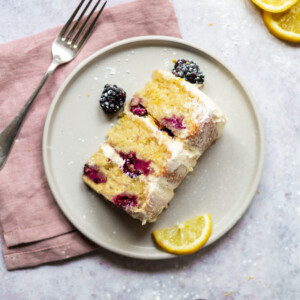
Our Lemon and Blackberry Cake is the perfect thing to make for a Spring inspired dessert. It's a zesty three tiered Lemon Cake, loaded with sweet fresh Blackberries. Then, between each layer of cake, is a light and fluffy whipped Vanilla Buttercream, and a few extra Blackberries.

We then top this off with even more fresh berries, a generous grating of tangy Lemon Zest, and a sprinkling of Icing Sugar.
We hope you enjoy this as much as we did!
Jump to:
Making the Lemon and Blackberry Cake using Olive Oil
This cake is oil based which keeps it Vegan friendly, and most importantly, it makes it super moist whilst remaining soft and fluffy - ie the perfect Sponge Cake!
The cake layers are Lemon flavored, and the Olive Oil gives the cake a delightfully moist texture. You can however, use another neutral flavour oil such as Coconut Oil or Avocado Oil, both will work well here.
Oil helps in making for a fluffy and soft cake, whilst also helping give the cake a sturdier structure, which is something that helps greatly with layer cakes such as this one. Something that works alongside the Olive Oil to achieve a perfect Sponge Cake is Vegan Buttermilk. Read below for more info on this.
What is Vegan Buttermilk?
Traditional Buttermilk is a fermented dairy drink. Originally, it was the liquid left behind after churning butter out of cultured cream.
Buttermilk is prized for its slightly sour flavor and remarkable properties in baking. When paired with baking soda, as it is in recipes such as buttermilk pancakes and buttermilk biscuits, the buttermilk's lactic acid reacts vigorously, creating a great rise and texture.
Vegan Buttermilk however, is often used in Vegan Baking as an egg substitute. It works with the other leavening agents in the recipe, such as Baking Powder and Bicarbonate of Soda (Baking Soda), to make the sponge rise (i.e make it fluffy and light).
Vegan Buttermilk is also responsible for helping to bind the ingredients together, as eggs would in a traditional Sponge Cake recipe, whilst also maintaining that all important moisture. No-one likes a dry cake!

How to Make Vegan Buttermilk
To make the Vegan Buttermilk, you simply add your chosen acid to your Plant Milk of choice, stir together, wait 5-10 minutes and watch the magic happen. You will start to see the Plant Milk separate almost instantly, but this will increase as you leave it for the full intended time depending on the chosen recipe.
Typically, you will mix 1-2 teaspoons of acid, with 240-250ml of Plant Milk. In this cake recipe we are mixing 1 teaspoon of Apple Cider Vinegar, with 250ml of Pea Milk.
When using Lemon Juice, we tend to use more of the acid per ml of Plant Milk. For example, 2 teaspoons of Lemon Juice to 240ml of Plant Milk.
We recommend using a high protein Plant Milk such as Soy, Pea or Almond. This is then paired with an acid such as Apple Cider Vinegar, White Wine Vinegar or Lemon Juice. Our preference is to use Apple Cider Vinegar, we find that it works best and produces the nicest flavour and texture in our cakes.
I have also used other Plant Milks such as Oat, Cashew and Coconut but found that they don't curdle either at all or as quickly, and we therefore avoid using these.
What You'll Need
Cake Ingredients
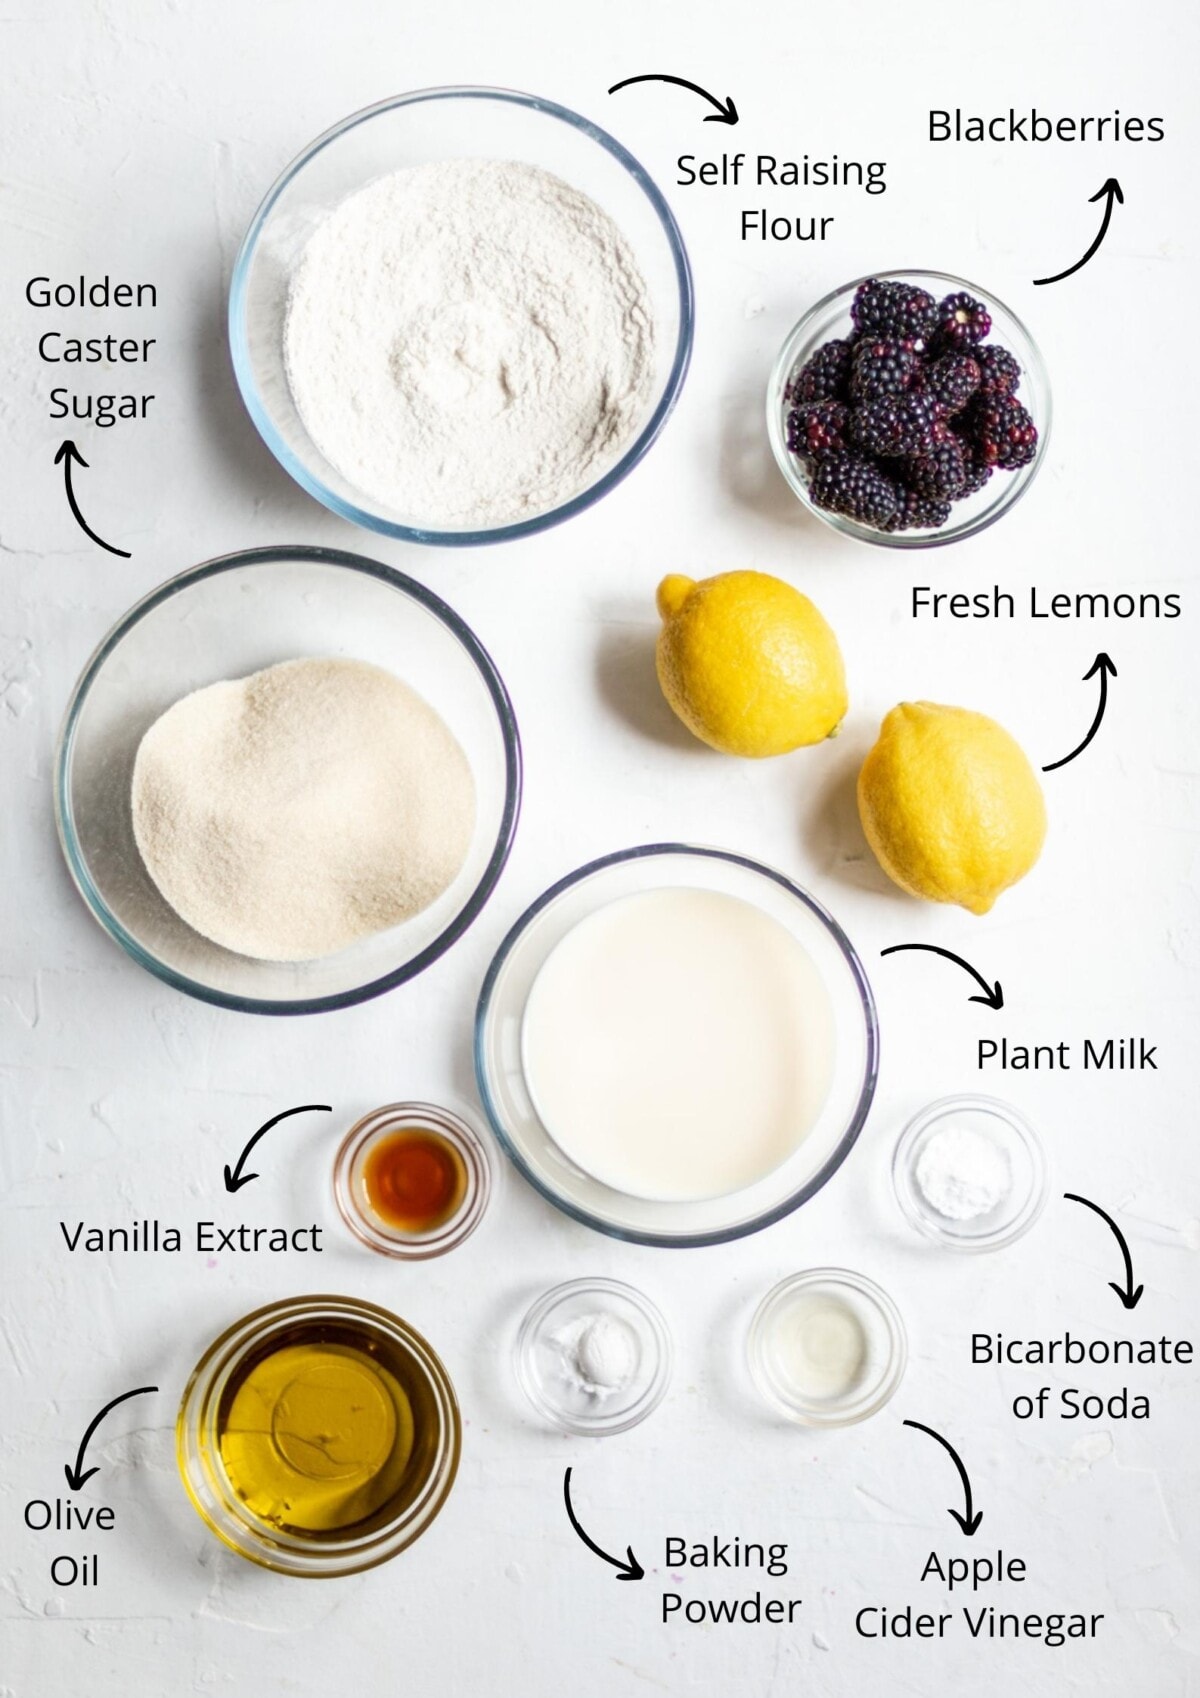
- Apple Cider Vinegar - This is used to create the Vegan Buttermilk. You can use White Wine Vinegar or Lemon Juice instead.
- Baking Powder - Used for helping the Sponge Cake to rise.
- Bicarbonate of Soda - Also called 'Bicarb' for short. This reacts with the acid in the Vegan Buttermilk to create the perfect sponge.
- Blackberries - When buying fresh fruit for recipes, we try and buy the best quality that we can afford, as we find that it can make all the difference to the flavour. Blackberries aren't in season in the UK until August-September, however they are still widely available in stores all year round from international growers.
- Golden Caster Sugar - Golden Caster Sugar is different from regular Caster Sugar as it has a 'honey' like flavour, which is delicious. You can however just use regular Caster Sugar if you can't access, or don't have, the Golden variety.
- Lemons - Again, the better quality ingredients you can buy, the better the end result. Lemons being no exception. This cake is even nicer with freshly grated Lemon Zest on top. Always remember to buy unwaxed lemons when you are using the zest.
- Olive Oil - Extra Virgin Olive Oil is best as it is very neutral in flavour. You can substitute this out for another neutral flavour oil such as Avocado or Coconut instead. If using Coconut Oil, refined Coconut Oil is the one you'd want, if avoiding the Coconut taste.
- Self Raising Flour - If using Plain Flour, add another 4 ¼ tsps of Baking Powder to the recipe. When mixing the dry ingredients together, really make sure they're well combined before adding the wet ingredients.
- Plant Milk - Because you need a higher protein Plant Milk to successfully make a Vegan Buttermilk, we suggest using Pea, Almond, or Soy milk for this recipe. I've tried it with all three and it worked perfectly every time. I did also try making this cake with Oat Milk but it didn't curdle when combined with the acid.
- Vanilla Extract - You can easily also use Vanilla Bean Paste, or Vanilla Pod instead. If you're using Vanilla Pod, you'll need one Pods worth of Vanilla Seeds. Simply slice open lengthways and scrape out the seeds.
Buttercream Ingredients

- Vegan Butter - We use Naturli Vegan Spread.
- Double Cream - We use Elmlea Plant Based Double Cream. It looks, tastes and behaves just like the Dairy version and we love it.
- Icing Sugar - Sift this when measuring it out - it will save you from getting lumps in your Buttercream.
- Vanilla Extract - You can use the seeds from a Vanilla Pod, if you have these on hand. Use 1 pods worth of seeds if so. You can also use Vanilla Paste in place of Extract.
Equipment
- Cake Stand optional
- Juicer
- Large Mixing Bowl
- Measuring Jug
- Sharp Knife
- Small Mixing Bowl
- Whisk
- Wooden Spoon
- Zester or grater
Instructions
First things first!
Before you begin making the cakes, preheat your oven to 350f/175c fan. Then line the bases of two 6 inch cake tins with baking paper. We use Springform release baking tins. However, if you don't have these, be sure to also grease the sides of your baking tins with a little butter prior to baking. This will stop your sponge cake from sticking to the sides.
Also remove the butter and cream from the fridge for the buttercream. You want these both at room temperature before you whip them up. If you add them together cold, or at different temperatures, your buttercream is likely to curdle when the cream is added. So don't skip this step!
Making the Buttermilk

Step 1 - To make the Vegan Buttermilk, add the Plant Milk and Apple Cider Vinegar to a bowl, and stir well to combine.
Step 2 - Set aside for 10 minutes to allow the Buttermilk to curdle. You will clearly be able to see that the milk has separated.
Making the Sponge Cake

Steps 3 & 4 - Add all of the dry ingredients to a large mixing bowl and stir together well. We use a whisk to do this as we find it the most reliable way to make sure all of the ingredients are evenly distributed (something particularly important when adding raising agents in baking).

Steps 5 & 6 - Zest and Juice both Lemons. We use a hand held grater for zesting, and a juicer for juicing.

Step 7 - Add all of the other wet ingredients (Buttermilk, Olive Oil and Vanilla Extract), to the bowl of Lemon Juice and Zest.
Step 8 - Mix well, then pour the wet ingredients in to the large mixing bowl containing the dry ingredients.

Step 9 - Gently mix the dry and wet ingredients together until well combined, but do not over mix. Stir using a whisk or wooden spoon until the cake batter is smooth and begins to 'bubble'. This is the reaction taking place between the raising agents and buttermilk. It means you'll have a perfectly raised sponge. If you over-mix the cake batter, it will flatten the air bubbles that you see forming, and therefore won't rise as well.
Step 10 - Sprinkle half of the fresh Blackberries over the top of the cake batter. Then gently fold them in using a wooden spoon. Folding your berries in to the cake batter, as opposed to stirring them in, will help retain the air bubbles.
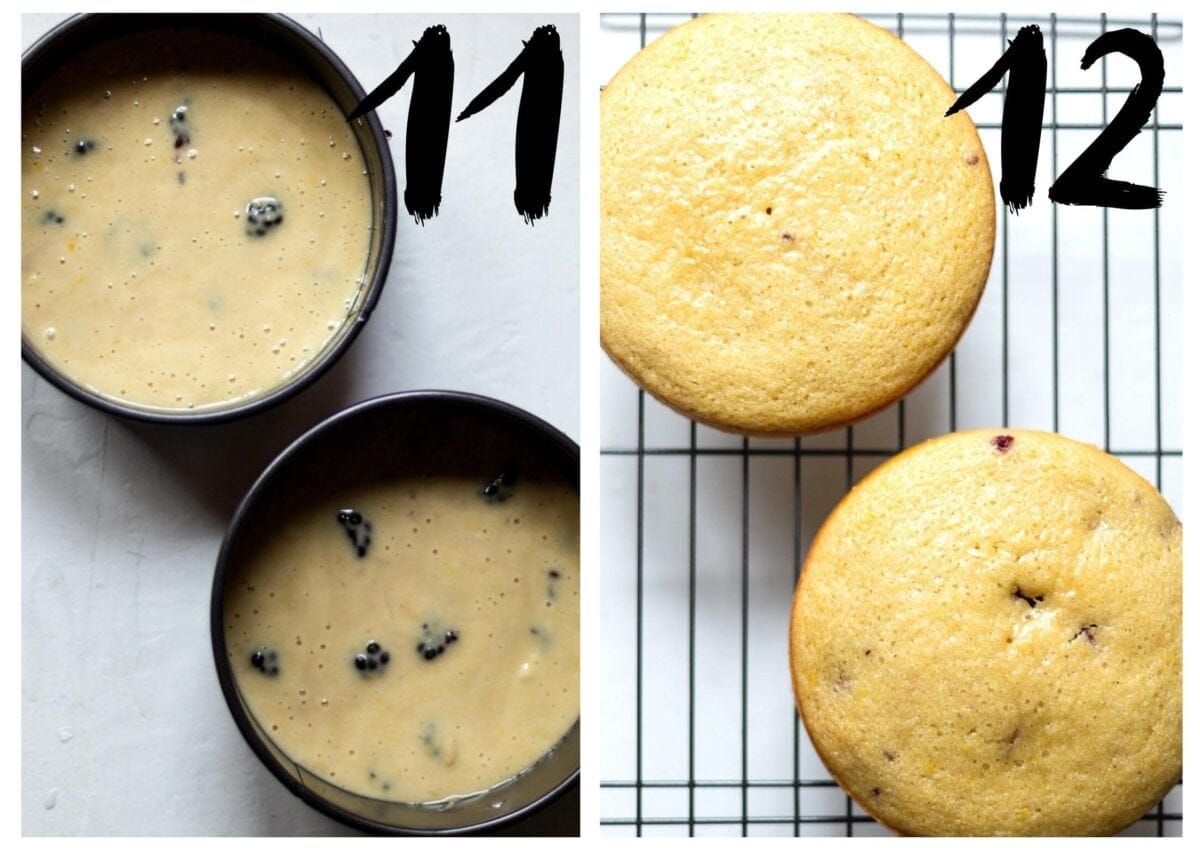
Step 11 - Evenly split the cake batter between your lined baking tins.
To do this with as much accuracy as possible, refer to our Recipe Tips section for a fool proof method.
Step 12 - Place your baking tins on the middle shelf of your pre-heated oven. Then bake for 20-22 minutes. The tops should be a golden colour. Use a toothpick or similar to test the center of each cake. If the toothpick comes out clean, your cake is fully cooked. If there is still some wet batter, return the cake back to the over for a further 5 minutes and test again.
Allow to cool for 5-10 minutes before carefully removing the cakes from the tins and placing on a wire cooling rack. Allow to cool completely before icing your cake.
Making the Buttercream
Time Saving Tip: You can make this whilst your cakes are in the oven.

Steps 13 & 14 - Add the Icing Sugar, Vanilla, and room temperature butter to a mixing bowl. Using either a stand or hand mixer, mix together on a medium speed until well combined and any lumps of icing sugar have gone. You want this silky smoooooth.

Steps 15 & 16 - Pour in the room temperature vegan double cream to your buttercream. Mix on high speed for about 30-60 seconds until the cream has 'whipped', and the buttercream is light and creamy. You will start to see a difference in the colour of buttercream and the folds created by the mixer will appear bigger. Compare photos from Steps 14 and 16 to see what your buttercream will look like at both stages.
Cover your bowl of buttercream with some clingfilm, and transfer to the fridge to 'firm up' before you start layering the cakes. I usually leave it in the fridge until all three cake layers have cooled completely. Chilling the buttercream makes it significantly easier to ice your cake.
Layering the Sponges and Buttercream


Step 17 - Place the first layer of your cake on to your cake stand. You can secure this in place by adding a small amount of Buttercream to the center of the cake stand, and then placing the first sponge cake layer directly on top. This will help to stop it sliding about.
Step 18 - Once your first cake layer is ready. Add a healthy sized dollop of the Whipped Buttercream on top. Using a spatula or similar, smooth this out until you have an even layer. Chop a few fresh Blackberries and evenly sprinkle these over the Buttercream.
Hint: Here we are using a cake turntable, which allows you to rotate the cake as you add the buttercream frosting - making life easier. You don't need one of these but if you bake cakes often, I highly recommend getting one, they're very inexpensive.
NB If you're using a turntable, don't secure the cake with buttercream, as you'll be moving it to a different stand once decorated. Instead, use a layer of baking paper underneath.

Step 19 - Add the second cake layer over the Blackberries, then repeat step 18. Finally, add your third and final cake layer.
Gently spread a layer of Buttercream over the top and sides of your Cake using a spatula, you can make it as thin or as thick as you like. Try not to rush this stage. If your Buttercream starts getting a little soft, pop it back in the fridge for another 20 minutes, then carry on.
If you have space, I also find that it helps to put the cake in the fridge at the same time. It makes it all much easier to work with.
Step 20 - To go for a 'Naked Cake' look, like we have pictured above, you can use the long side of a cake spatula, or a cake scraper, to gently scrape the Buttercream from the sides of the sponge. This will keep the Buttercream between the layers and on top. And it will allow the sponge layers to peek through.
Substitutions
- Nut Free - Instead of using Almond Milk, use a nut free Plant Milk such as Pea or Soy. The same goes for the Vegan Butter, some of these can contain nut oils, so check the ingredients first.
- Gluten Free - I haven't attempted making this cake Gluten Free yet, but Rhian over at Rhian's Recipes has a Gluten Free Victoria Sponge Cake recipe that you can make instead. To make her Victoria Sponge 'Lemony', simply add the same amount of Lemon Zest and Juice as per this recipe. You will also need to multiply the recipe by 1.5 in order to get enough sponge cake for 3 layers.
Variations
- Berries - You can add Blueberries or Raspberries instead of the Blackberries.
- Additional Flavours - For a little something different, you could add in 2 tsps of Cardamon to the cake batter when adding the dry ingredient together. Blackberry, Lemon and Cardamon go very well together.

Storage
Storing the sponge cake layers - If you're making the sponge cake the day before, or even two days before icing them, you can wrap these individually in clingfilm, and store in the fridge until ready to use.
Storing the decorated cake - Store the cake in a cool, dark place away from any direct sunlight. If your cake gets too warm, the buttercream will soften, which has potential to make the cake layers slide.
The cake will keep for up to 5 days.
Storing the Buttercream - Store the Buttercream in the fridge in an airtight container. You can also cover the mixing bowl that you made it in with cling film and store that in the fridge. The Buttercream will keep for up to 2 weeks.
Recipe Tips
For splitting the cake batter evenly I like to use a ladle. In an ideal world you'd have three baking tins the same size. But, if you're like me and only had 2, then start by using 2 tins and another bowl to help you split the batter 3 ways.
I usually get about 4 ½ ladles worth of cake batter to each tin. If following my genius method, start with one ladle full in one tin, then another ladle full in the other, and same again for either the third tin or the additional bowl you're using to measure it in to. Then continue this until the mixing bowl is empty. You don't need to be 100% precise with this, but you can get it pretty close.
If you've used a bowl for your third measure of cake batter, set this aside until the other two layers have fully baked in the oven. At which point you can then clean and re-line one of the used tins, and bake the third portion of the cake batter as per Step 12.
FAQ's
To make Vegan Buttermilk, you simply add your chosen Acid to your Plant Milk of choice, stir together, wait 5-10 minutes and watch the magic happen. You will start to see the Plant Milk separate almost instantly, but this will increase as you leave it for the full intended time depending on the chosen recipe. For additional information, including quantities, please see How to Make Vegan Buttermilk.
Other Cakes, Brownies and Dessert Ideas
Here are a few of our other Delicious Recipes you might like to try.
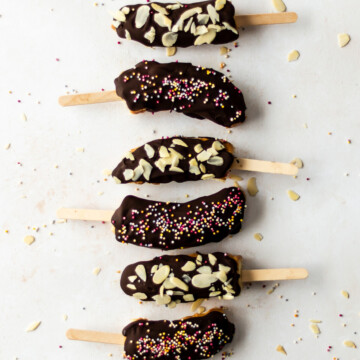

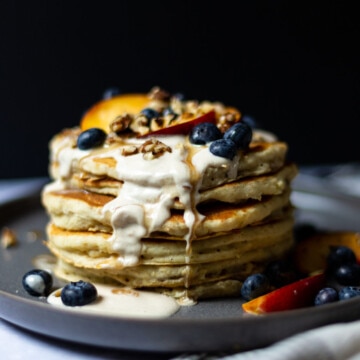
For some smaller cakes and treats why not try our Vegan Caramel Slices, or maybe our delicious Black Bean Brownies. Or for another dessert thats just a little bit special you've simply got to give our Raw Vegan Strawberry Cheesecake a go!
Recipe
Lemon and Blackberry Cake
Equipment
- Cake Stand optional
- Juicer
- Large Mixing Bowl
- Measuring Jug
- Sharp Knife
- Small Mixing Bowl
- Whisk or fork
- Wooden Spoon
- Zester or grater with zester
Ingredients
Cake ingredients
- 360 ml Plant Milk Soy, Almond, Pea
- 1½ teaspoon Apple Cider Vinegar
- 330 g Self-Raising Flour
- 320 g Golden Caster Sugar
- 110 ml Olive Oil
- 1½ teaspoon Bicarbonate of Soda
- ¾ teaspoon Baking Powder
- 1½ teaspoon Vanilla Exract or Vanilla Paste
- 3 Lemons Zest & Juice
- 90 g Fresh Blackberries plus extra for topping/serving
Buttercream ingredients
- 200 g Dairy free Butter
- 300 g Icing Sugar
- 1½ teaspoon Vanilla Extract or Vanilla Paste
- 60 ml Vegan Double Cream
Instructions
Before you start:
- Preheat your oven to 350°F/175°C fan
- Line the base of 2 x 6inch cake tins with baking paper.
- Hint: Remove the butter and cream from the fridge for the buttercream. You want these both at room temperature before you whip them up.
Make the Vegan Buttermilk
- To make the Vegan Buttermilk, add the Plant Milk and Apple Cider Vinegar to a bowl, and stir well to combine.360 ml Plant Milk, 1½ teaspoon Apple Cider Vinegar
- Set aside for 10 minutes to allow the Buttermilk to curdle. You will clearly be able to see that the milk has separated.
Make the Sponge Cakes
- Add all of the dry ingredients to a large mixing bowl and stir well. We use a whisk to do this as we find it the most reliable way to make sure all of the ingredients are evenly distributed.330 g Self-Raising Flour, 320 g Golden Caster Sugar, 1½ teaspoon Bicarbonate of Soda, ¾ teaspoon Baking Powder
- Zest and Juice the Lemons. We use a hand held grater for zesting, and a juicer for juicing.3 Lemons
- Add all of the other wet ingredients (Buttermilk, Olive Oil and Vanilla Extract), to the bowl of Lemon Juice and Zest.110 ml Olive Oil, 1½ teaspoon Vanilla Exract
- Mix well, then pour the wet ingredients in to the large mixing bowl containing the dry ingredients.
- Gently mix the dry and wet ingredients together until well combined, but do no over mix. Stir using a whisk or wooden spoon until the cake batter is smooth and begins to 'bubble'.
- Sprinkle half of the fresh Blackberries over the top of the cake batter. Then gently fold them in using a wooden spoon. The remaining half of the Blackberries will be used to layer the cake with.
- Evenly split the cake batter between your lined baking tins.To do this with as much accuracy as possible, refer to our the notes section below for a fool proof method.
- Place your baking tins on the middle shelf of your pre-heated oven. Then bake for 20-22 minutes. The tops should be a golden colour. Use a toothpick or similar to test the center of each cake. If the toothpick comes out clean, your cake is fully cooked. If there is still some wet batter, return the cake back to the over for a further 5 minutes and test again.
- Allow to cool for 5-10 minutes before carefully removing the cakes from the tins and placing on a wire cooling rack. Allow to cool completely before icing your cake.
Making the Buttercream
- Add the Icing Sugar, Vanilla, and room temperature butter to a mixing bowl. Using either a stand or hand mixer, mix together on a medium speed until well combined and any lumps of icing sugar have gone. You want this silky smooth.200 g Dairy free Butter, 300 g Icing Sugar, 1½ teaspoon Vanilla Exract
- Pour in the room temperature vegan double cream to your buttercream. Mix on high speed for about 30-60 seconds until the cream has 'whipped', and the buttercream is light and creamy. You will start to see a difference in the colour of buttercream and the folds created by the mixer will appear bigger.60 ml Vegan Double Cream
- Cover your bowl of buttercream with some clingfilm, and transfer to the fridge to 'firm up' before you start layering the cakes. I usually leave it in the fridge until all three cake layers have cooled completely. Chilling the buttercream makes it significantly easier to ice your cake.
Layering the Sponge Cakes and Buttercream
- Place the first layer of your cake on to your cake stand. You can secure this in place by adding a small amount of Buttercream to the center of the cake stand, and then placing the first sponge cake layer directly on top. This will help to stop it sliding about.
- Once your first cake layer is ready. Add a healthy sized dollop of the Whipped Buttercream on top. Using a spatula or similar, smooth this out until you have an even layer. Chop half of the remaning fresh Blackberries, and evenly sprinkle these over the Buttercream.
- Add the second cake layer over the Blackberries, then repeat the previous step with the Buttercream and Blackberries.
- Finally, add your third and final cake layer.
- Gently spread a layer of Buttercream over the top and sides of your Cake using a spatula. You can make them as thin or as thick as you like. Try not to rush this stage.
- Tip: To go for a 'Naked Cake' look, like we have pictured in the recipe, you can use the long side of a cake spatula, or a cake scraper, to gently scrape the Buttercream from the sides of the sponge.
- OPTIONAL: Top with extra Blackberries, some more Lemon Zest and a dusting of Icing Sugar.
Poppy
I didn't know how much I needed this cake in my life until I made it myself. I love how easy this recipe is to follow. This cake tastes amazing! Thank you.
Yasmin
Hi Poppy. We're so glad to hear that you enjoyed following this recipe. We love this cake and are really pleased to hear that you do to.
Cleo
A friend told me about this cake and I just had to try the recipe. I can see now why she wouldn't stop going on about it, its really scrummy!
Flick
What a fab cake! I'm really glad I picked this one to try. It was really easy to make and tastes great. I loved trying the naked cake look when I built the cake as well, it worked really well.
Hanna
Yummy!!!!! Really easy recipe to follow as well. This was the first time I've attempted a cake like this and I'm really pleased with how it has turned out.